Blog

  • Machu Picchu: a Cheap and Sustainable Way to Visit

    Machu Picchu: a Cheap and Sustainable Way to Visit

    The most famous and spectacular way to reach Machu Picchu is hiking the Inca Trail: a path carved across the side of mountains that takes about four days, according to the route you choose. It recently became so popular that the maximum capacity is quickly reached and it’s quite hard to find a place in a tour, unless you opt for the high luxury range.

    We got there from Cusco, in pure DIY fashion and keeping the costs to the bone. Here’s how we did it…

    How to get access to Machu Picchu

    The archaeological site, UNESCO heritage, has a limited number of daily tickets which are dealt with by the government. The tickets need to be purchased in advance if you want to guarantee your access on a specific day, and even more so if you want also to climb to Huayna Picchu, which is the peak visible in the most iconic photos. From up there you’ll have a great view on the site and you’ll have access to what remains of the buildings that the Incas thought well to build on those all but vertical walls at 2700m.
    As an alternative the other mountain (which name is Machu Picchu but to avoid confusion is called montaña) can be added to the ticket. The view is less rewarding and the climb is tougher.

    How to buy the ticket

    Tickets are sold on the website machupicchu.gob.pe. The procedure is not straightforward but quite simple to sum up:

    1. Select site, ruta (route), date and number of people to proceed with the purchase;
    2. You’ll get a file with a booking code. Such code will be needed to make the payment in the “PAGOS” section of the website. The payment needs to be processed within three hours from the booking;
    3. Once the payment is confirmed you’ll need to check-in, in the “CHECK – IN” section of the website. Only now you well get the proper entrance ticket, one page per person.

    You’ll receive in total three documents but the entrance will be only guaranteed with this ticket. Absolutely necessary to bring the ID specified in the ticket and the bank card used for the payment.

    How to get there

    If you got this far in the page I guess you’re not considering taking the helicopter or the train to get there. Otherwise you’re on the wrong blog.
    The Inka Rail trains have ridiculous prices, unless you are a Peruvian citizen. But for those who won’t make it to the Inka Trail there’s an alternative – and significantly cheaper – way to reach Machu Picchu from Cusco.

    Any agency in Cusco can book the bus per Hidroelectrica, via Santa Teresa. It will be a small creaky 12 seater recklessly driving on dusty roads for 6 hours. The last part of this road is on the edge of a precipice and, obviously, two-ways. Make sure you have enough coca leaves and anything you might need for motion sickness.
    After the bus starts a 13km walk along the railway to get to Agua Calientes, also known as Machu Picchu Pueblo. The walk takes on a pleasant path cutting across a strip of forest at the foot of the Inca mountains where you can see exotic plants such as mango, papaya and avogado, eat coffee beans straight from the plant and perhaps spot a flock of green parrots.
    The next day will start at 4am, queuing up at the gate where the ascent starts. The gate opens at 5 and from there is a good hour of steps to get to Machu Picchu: 1.3km for a 500 climb.
    We spend two nights in Agua Calientes, dedicating one day for each way of the trip and a whole day in Machu Picchu rather than having to run away at noon to catch the bus.

    Suggestions

    The worst mistake I made was the choice in clothing. Despite the high altitude the area is subtropical, hence warm and humid.
    Another big problem is represented by insect bites: mosquitoes, midges, sand flies… whatever those beasts were they left conspicuous marks on arms, face and any other corner of exposed flesh.
    Last thing about water and food provisions: the shops in Agua Calientes aren’t cheap but not exceedingly more expensive than the ones in Cusco. Just take the necessary for the bus trip and the hike and avoid taking on your shoulders, say, 6 litres of water. In Hidroelectrica there are several restaurants serving decent food for 10 soles.

    To sum up:

    • Light / technical clothing
    • Long sleeves, long trousers
    • DEET repellents to soak your clothes in
    • Antihistamines in case of bites
    • Water and food for 6 hours on a but and 3 on foot

    Sustainable tourism in Machu Picchu?

    I have no doubts, tourism in Machu Picchu is unsustainable. As a UNESCO site the daily limit should be 2500 people, but it easily gets to 5000 or more. More than the 70% of those, according to our guide, don’t even bother walking the last bit of just over 1km and take instead one of the many diesel shuttle buses incessantly going up and down. Often they reach Agua Calientes by train which, as romantic as it might sound, not only is absurdly expensive but vomits on each trip thick clouds of black smog on the lush forest it crosses.
    It’s also easier to observe that the less effort a tourist puts into reaching a place the least is their respect for it. The guides spend their time explaining facts and stories to deaf ears, mostly patiently waiting for each member of the group to take the perfect facebook photo, telling off those unlawfully feeding the lamas or putting their and others lives in danger with the ubiquitous selfie stick.

    The government turns a blind eye for the sake of money and, as it usually happens, who pays the consequences are those who cultivate a genuine interest and want to experience a meaningful visit of Machu Picchu and the remarkable guides. But also the future visitors as with this reckless policy of overcrowding and pollution the integrity of the site itself is in danger.
    If it was for me I would abolish all the buses, leaving a service only for those who are physically unable to walk, but this will just be a dream as long as short-term profit is the decisive factor.  I’m sure that these places need to be earned with time and sweat because, if its true that it’s everyone’s right to visit such an important site, it’s also true that everyone must also deserve it.

  • Monsters in the Lagoon: Cruise Ships in Venice

    Monsters in the Lagoon: Cruise Ships in Venice

    Before this summer I never heard about Gianni Berengo Gardin. If you too don’t know who he is don’t worry, I did all the googling for you: Berengo Gardin spent the past 60 years behind a camera and his black and white shots preserve intimate frames of a timeless Italy. His most famous photo is probably Venice Vaporetto (1960) and in the Seventies he documented the pitiful state inside the Italian madhouses, helping the dismissal of such anachronistic institution.
    More recently he documented with his typically crude images the horror of cruise ships in Venice and, once more, he stirred up some chaos.

    I felt like destroying something beautiful

    Walking around in Venice one has the feeling of being surrounded by a piece of art: precious palaces, alleys so narrow that both walls can be touched at the same time, stone bridge crossing canals so narrow that could be easily jumped over. And then you see them, the cruise ships. Enormous steel hulks of opulence – higher than the Doge’s Palace, longer than San Marco Square – sliding through in striding contrast, like the proverbial bull in a china shop. Such ugliness and such beauty, destroying it with the excuse of loving it.
    The photos of Berengo Gardin are an exact depiction of cruise ships passing through Venice, and his exhibition has been prohibited by the mayor as “it would damage the image of the city”.

    Crociera

    The cost of money

    The current mayor of Venice, a practical and greedy entrepreneur, promotes a project that will allegedly improve the safety conditions digging new deeper canals for the ships. This was fed to the public as a sensible plan, even though ignoring the fact that new diggings will seriously compromise the fragile balance of the lagoon’s ecosystem. In this idyllic area, neither sea nor land, where unique species thrive and ancient traditions survive, we allow those ships to go through, deluded that it might be an advantage. Cathedrals of waste and tawdry tourism, disgorging thousands of people everyday for their blitz of selfies and trash.

    Cruise ships aren’t surely the only problem of Venice, and neither the only source of the flocks of bored tourists roaming the narrow streets of the city, but they are the most visible symbol of the illness that is chocking Venice. The local population, constantly under siege of hordes wearing silly hats and following red umbrellas, is forced to leave, as bread milk and meat in the shops are being replaced by expensive plastic souvenirs.
    A city orphan of its inhabitants is a city without memory and without daily activity, hence it’s as good as dead, sold by the kilo and transformed in an amusement park. Veniceland, as they called it with bitter sarcasm, appearing on thousands of photos all over the world, barely visible behind the faces of those who contributed to its death.

    Sino Grand Navi

    The Great Beauty

    To write this article I did an extensive research, digging deep into the economical, environmental and political reasons and consequences behind the cruise ships debate.
    I learned that all numbers can be opinions and all words can be twisted, but one thing that cannot be denied is Beauty. It’s obvious, simple and irrefutable. Yet we’re destroying it, to please the very same people who travel to see it and, in the process, deface it. So let’s build a proper Veniceland, since that is what everybody want, a perfect plaster reproduction somewhere else that in the photos will look exactly as the original one.

    Gianni Berengo

    Using the words of the photographer Berengo Gardin: “I was disturbed above all by the visual pollution; seeing my Venice having its proportions destroyed and being transformed into a toy, into one of those two-bit clones like you find in Las Vegas, unsettled me very deeply”.
    His exhibition is all about that and, if you happen to be in Venice by the 6th January 2016, you can still see it at Negozio Olivetti.

    “Mostri a Venezia” (Monsters in Venice) photo by Gianni Berengo Gardin

    The first two photos have been posted by the groups Vogliamo Venezia and Comitato No Grandi Navi, which I thank for their commitment.

  • 8 Ways to Prepare For a Road Trip

    8 Ways to Prepare For a Road Trip

    Going on a road trip can be a fun adventure, but it’s important to get ready to make sure everything goes smoothly. To avoid problems and make sure you have everything you need, take time to check your car and plan ahead. From checking your tires to bringing the right papers, here are eight simple ways to prepare for a safe and easy African road trip.

    Inspect Your Brakes

    Brakes are pretty important to say the least and you will be using them more on a road trip. To ensure your brake pads don’t have excessive wear that could result in a failure, it’s a good idea to have them checked. Brakes should be inspected at least once every six months.

    Check Your Tires and Bring a Spare

    We’ve all seen the bummed people on the side of the road with a blown-out or flat tire. You may have even been that person at some point. You can prevent blowouts and flats on a road trip by checking your tires before you take off, ensure you have enough tread on all four tires, consider getting your tires aligned and balanced and tire pressure in all four tires is right for your vehicle, As you head out, it’s also a good idea to have a spare tire just in case. Plus, you’ll need roadside assistance or the know-how and tools to change it yourself.

    Test Your Lights

    Your headlights, tail lights, turn signals, and brake lights will be important on a road trip. They ensure everyone around you knows what you’re going to do. You can also end up with a ticket for non-functioning lights, which is a major buzzkill on any road trip. So, perform a quick check to make sure all your lights are in working order.

    Consider an Oil Change

    Are you due for an oil change soon? If so, you might as well take care of it before your road trip. If you won’t come close to hitting the mileage milestone required for your next oil change, don’t worry about it. Either way, it’s a good idea to check all of your fluids and fluid levels before taking off.

    Get a Tune-Up

    If you’re not mechanically inclined, it’s not a bad idea to schedule a tune-up with your mechanic before a long road trip. That way, they can perform a safety inspection and make sure you don’t need any repairs so you can drive with confidence and peace of mind.

    Check the Weather and Roads

    Bad weather can turn a fun road trip into a nightmare. Depending on the situation, it could be dangerous and result in delays and detours. Being so, keep an eye on the weather and road conditions all along your route so you won’t be caught off guard. You can check both online.

    Have Your Right Full Travel and Vehicle Documents

    While it’s always important to have the required papers in the car with you, it’s even more important on a long road trip far from home. Ensure you have your license, registration, proof of insurance, and the contact information for your roadside assistance provider, if you have one.

    Get Enough Rest, Food and Water

    Long drives can be exhausting. You may start out feeling great, but after five or so hours, you’ll likely begin to feel strained. So plan out your trip carefully starting with the night before. Ensure you get seven to eight hours of sleep. Plan breaks to eat, drink, and rest. Consider taking turns with other drivers when possible. And don’t push yourself beyond what’s comfortable, as drowsy driving can be hazardous.

    Conclusion 

    With a little preparation, your road trip can be the enjoyable self drive experience you’ve been anticipating. By following these eight steps—whether it’s ensuring your car is in top shape, planning for the unexpected, or prioritizing your well-being—you’ll set yourself up for a smooth and memorable journey. So take the time to check off these essentials before you hit the road, and you’ll be ready for whatever comes your way. Safe travels!

  • Lake Titicaca: a few days between Islands and Folklore

    Lake Titicaca: a few days between Islands and Folklore

    Lake Titicaca is in the southern part of Peru, across the border with Bolivia. Located at the dizzying heigth of 3800m a.s.l. it’s the highest navigable lake and deserves a visit for its pretty islands and the colourful and lively communities that populate the area.

    Puno and the Islands

    The starting point for those who come from Peru is Puno. The city is pretty ugly and doesn’t deserve more than the necessary time. It’s all about a Plaza de Armas, a tourist strip with some restaurants and little more. Even the Central Market, usually our favourite place and focal point of every city we visited, is quite unremarkable. I feel almost guilty in writing that because it was here that we lived one of the best experiences of our stay: stranded in town while every other tourist was on some organised trip, we ended up in a colourful parade. It was beautiful and everyone was so positive and friendly that they made it up for all the time we didn’t enjoy the city.

    Puno Festa

    Uros, Taquile and Amantaní

    The only real reason to visit Puno should be the island that can be reached from there. To visit them there are two kind of standard tours:

    1. One day: visiting the islands of Uros and Taquile
    2. Two days: visiting the Uros Islands and sleeping on Amantaní; lunch in Taquile the next day

    In each agency you’ll be shown beautiful photos but it’s all a massive tourist trap. The floating island of Uros are fascinating: how they’re built and maintained, and the history behind that, but it’s mostly a big floating souvenir shop where you’ll spend most of the time dishing out “no gracias” to people selling all sort of things. It’s less dramatic on the two other islands but it all feels pretty false, and everything seems made just to please the average squandering tourist. The night on Amantaní island will be spent in a family house, a beautiful way to directly finance the local communities but bear in mind this is no couchsurfing: you might find an exceptionally friendly family but otherwise you’re business as usual. They’ll provide you with a warm dinner and clean bedding and that’s it, most of them also speak mostly quechua which is fascinating but might make the communication even more complicated. Moreover you’ll be forced to take part to a town fest that will take place exactly when you are there, what a coincidence. They’ll dress you up and make you dance. If you have a passion for the deliberate entertainment you’re going to love it.

    Where to sleep: Hostal Pukara (Jr. Libertad Nº 328). Good location, very clean, hot water and heating in the rooms.
    Where to eat: La Casona (Jirón Lima 423). Tasty alpaca meat, craft beers. Otherwise the city is plenty of pizzerias with wood fired oven most of them are on Jirón Libertad, go for the busiest one.
    Responsible Travel Agency: Any agency offers island tours, but this is the only one we found that gives importance to financing the local communities: at All Ways travel you will only pay the agency and transport fee while you’ll pay the rest directly to the hosting families.

    How to get in Bolivia

    After Puno it will be a relief to move to Bolivia, on the eastern shores of the lake. It takes 3 hours by bus and the ticket can be made directly at the bus station (if you want to save on the agency fees), or at the agency (if you want to save time and the moto-taxi fee to get to the station, which is usually 2 soles).
    If you don’t need a visa it’s very easy to get in: you’ll just need to fill the papers you’ll be handed on the bus and go through the two border offices for the stamps.
    The bus usually stops a bit before the border to change the local currency, the Bolivianos (which is roughly 10 to 1 Sol).

    Copacabana and the Islands

    Copacabana in Bolivia is just about more pleasant than Puno: the action happens all around Avenida 6 de Agosto, the classic bar-and-restaurants strip with the bus stops on one end and the harbour on the other.

    Isla del Sol Bolivia

    Isla del Sol

    Isla del Sol is stunning and offers some unforgettable views: terraces peppered with white alpacas, white sand beaches grazed by the deep blue waters and, far at the back, the snowy caps of the Andean Sierra.
    Boats leave Copacabana twice a day to the south of the island (the closest part, can be visited in one day), and the north. In the north is possible to visit the sacred sites of the Incas and, before them, the Aymara, from the port follow one of the guides that will lead the group for a one hour hike and will explain the history of the place, mixing facts and mythology.

    The best route, if you arrive in Copacabana in the morning, is: take a ferry to the Comunidad Yumani in the south (if you take the 1pm boats you’ll arrive mid-afternoon) and start the trek across the island. It’s a quite easy hike of about two hours and you can stop anywhere to spend a night, there’s plenty of hotels and B&Bs so I wouldn’t worry to much about it. The next day you can visit the archaeological sites and take a boat back.

    Where to sleep: If you don’t sleep on the island just look for a decent place near the port, which on Google Maps is marked here: Monumento Avaroa. Avoid the hotel Lago Azul and make sure your place has hot water and heating, you’ll need it.
    Where to eat: you’ll be spoilt for choice along Avenida 6 de Agosto, which looks like a 3D version of the Lonely Planet suggestions page. We had a good meal at El Trebol, a place with a preposterous but charming decor and some tasty vegetarian options.

  • Bike Sharing in Milan: How to Use BikeMi

    Bike Sharing in Milan: How to Use BikeMi

    Travel like a clueless tourist

    I could have checked the website for information ahead, I could have looked up the nearest bike station before arriving, I could have signed up to the bike sharing service the day before. But I didn’t, instead I wanted to arrive in Milan completely unprepared and figure out by myself how to get a bikeMi, as any new-arrived would have to.

    I arrived in Garibaldi station, which is not the most popular choice therefore there are no information offices or help for tourists whatsoever. I found a rack of bicycles after a nice stroll along the pedestrian Corso Como, past the big stone arch that gives the name to the rail station.

    The instructions are clear and written in four languages. I struggle a bit to hook up one of the many free wi-fi hotspots so I give up and I pass on 3G. A few clicks (the site is apparently only in Italian but the “sign in” button is quite obvious: a hand holding a pen) and I get the code that will grant me a bike for the next 24 hours.

    How does BikeMi work?

    With the code provided you will unlock a bike, use it and put it back in any station when you’re done. Repeat whenever you need. It’s very simple and, being Milan so small and flat, is much better than the motorised public transport, weather permitting.

    Remember: you need to return the bike within 2 hours, after which you can just pick another one. If you exceed this time limit for three times your account will be suspended.
    The service is active from 7am to midnight, after that it’s only possible to return a bike, not pick it up.

    If there are no slot where to return a bike or there are no bikes to pick up you can type the code on the column and the nearest available station will be shown.

    How much is it?

    • Daily (24 hours): €2.50
    • Weekly: €6.00
    • Annual: €36.00

    As you can see 24 hours on a shared bike is €2 cheaper than the 24 hours public transport pass.

    How to get a shared bike?

    You can subscribe online, which is by far the most convenient way to do it. Alternatively you can call the free-toll number: 800 80 81 81 or go to an ATM points (ATM being the public transport company of Milan) open from Monday to Saturday, 7.45am – 7.15pm at these stations:

    Duomo M1-M3
    Cadorna Triennale M1-M2
    Loreto M1-M2
    Centrale M2-M3
    Garibaldi M2
    Romolo M2

    What do you need?

    To make your experience smoother I would suggest to subscribe ahead. Also make sure you know where the bike stations are: there is an online map, but it might be tricky to use if your smartphone is as rubbish as mine, alternatively you can download this map.

  • In Search of Blue Waters and Beautiful Baskets

    Indonesia has been at the top of my bucket list for many years now. It has the perfect combination of religious diversity, beautiful beaches, indigenous communities, artisan handicraft, and over 17,000 islands to explore. It’s been sitting on the back-burner for years now because I was too overwhelmed when reading the guidebooks and travel blogs to even know where to start. There were just too many places to explore for one trip. The waiting paid off, though. My friend, Jennifer, went to Bali last year and rented a villa in the northern region for a month so she could relax, unwind, work and rejuvenate. She loved the villa and the staff so much that she bought it. So, decision made… Bali it was!

    We decided to spend a month at her villa and use that as a home base to explore the surrounding areas. Villa Sedang was a three bedroom, three and half bath stunning space with an infinity pool and a staff of eight. It was situated right on the ocean in a village called Kalisada. The nearest tourist spot was about 30 minutes away in Lovina Beach. We arrived and settled right in. I could not believe the view. The villa had a completely unobstructed view from the front door entrance all the way to the ocean and black sand beach. I knew this was going to be a place I could relax after several long days of travel. We spent the first week getting to know the village, walking around the beach, shopping and eating in Lovina, trekking through the rice paddies, and snorkeling and scuba diving at Menjangan Island.

    Our trek was spectacular and organized by a local community-based tourism initiative known as Mayong Green. Locals in the village acted as guides and explained how the rice paddies were harvested, took us through traditional homes, introduced us to families, and let us try locally grown fruits. Mayong Green creates jobs in the village and with every guest, a donation is granted to projects in the community. It was blazing hot walking through those rice paddies, but it was my first experience doing so, and I couldn’t get enough of the lush, green surroundings, especially knowing that my tour was making a difference to the people I was meeting. Our guides, Putu and Komang, were great. They held our hands as we slid down the hills and then caught us before we could tumble into the river or damage the crops. It was clear that we had stepped into a completely different world.

    On Menjangan Island, we arranged a day out on the water with Arrows Dive and spent hours exploring the beautiful coral reef walls in an underwater paradise. While I had my PADI diving certification, I felt just plain rotten at diving and preferred to snorkel. Snorkeling around off the shores of Menjangan Island was the best snorkeling I had ever experienced. The bright yellow and blue corals, giant purple clams and multitudes of brightly colored fish were breathtaking. Lately, snorkeling had become my sanctuary when I needed to unplug and turn off all the noise. Nowhere above water had I felt so much serenity. The pure quiet seemed to lovingly wrap itself around me and I felt an overwhelming sense of peace when I took off on my own and glided through the water. At the end of the day, we motored back to the harbor and I sat back and took in the mountains that surrounded us on every side. It was some of the most beautiful scenery I had ever seen.

    After a week of staying close to the villa, it was time to pack a bag and get on the road. We traveled down to Ubud – the hub of tourist activity on the island – and checked into an Airbnb located directly across from the Monkey Forest. The next four days were spent shopping, shopping… and shopping. Hence, the reason I ended up paying more in baggage fees than on my plane ticket!

    Ubud is a charming town full of handicraft markets, trendy boutiques, quaint cafes and a splash of Western influence. Owning a fair trade company makes me constantly intrigued by new ideas and products in this industry, and Bali is known as one of the best places on Earth to source beautiful, handmade products. We scoured the markets for new ideas and samples, and of course we got charmed into buying a few things for ourselves. On several days, we went to the outskirts of Ubud to see the artisans in their actual workshops. We visited artisans making baskets, wood furniture, glassware, silver jewelry, statues and stunning textiles. I was thoroughly impressed by the talent around me. I often find so much joy in watching simple natural resources being turned into gorgeous, relevant products for house and home, (and at prices that seemed criminal!). Jennifer found huge wooden statues, glassware, giant baskets, paintings and more at a fraction of what the cost would be in the United States. And I was happy to find colorful rugs, wall hangings, blessing baskets, and wood products that barely fit into my luggage.

    Following Ubud, we spent a night in Sanur and caught the fast boat to the Gili Islands. The fast boat was more like a third class cattle car you would see in India. It was downright horrible, and even though we purchased a ticket ahead of time, we were left without a seat… for two hours. We pushed through and finally arrived at Gili Air to be met by tons of horse drawn carts waiting to take us to our hotel. These islands don’t have cars, which means they have an abundance of fresh air, no traffic and no annoying horn honking to deal with. You can bet we breathed a sigh of relief to these discoveries. We loaded our luggage onto one of the horse carts and began the journey to Sunrise Resort. This boutique hotel sat right on the beach, had a great restaurant, and provided accommodations for all budgets: backpacker to private suite. The only thing missing was WiFi (the entire island lacked WiFi, so we were encouraged to truly unplug for the five nights we were staying). Anyone who knows me or has traveled with me knows this is incredibly difficult for me. Whenever I am exploring a new destination, I am always anxious to post on social media to inspire others to travel. I enjoy telling my story right away in the hope that someone else will go out and have their own adventure and tell their own story. But, alas, I powered through.

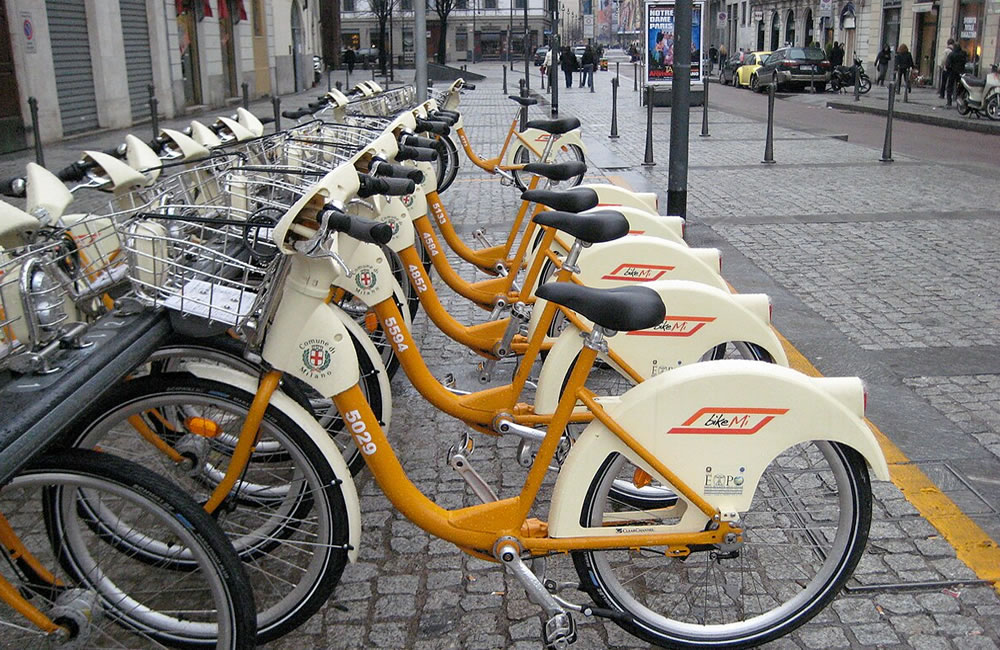
    The Gili Islands are made up of three islands: Gili Trawangan is the biggest and most popular island. This is where most of the tourism in the area is centered. There is an abundance of beach clubs, restaurants, dive shops, boutiques and spas. Basically, there is never a dull moment in Gili T. The second biggest island is where we were staying, Gili Air. This island is closest to Lombok, has great diving, and is relatively quiet compared to Gili T. A favorite activity of those staying on Gili Air is to rent bicycles and ride around the entire island. We did this one morning and were delighted to discover fun beach shacks, reggae bars and beautiful green spaces hidden along the path. The smallest of the islands is called Gili Meno. This island is where you are most likely to interact with the local population as there are limited numbers of hotels and restaurants. This is the island to choose when you want to escape it all and really connect to the village and its culture. It was beautiful and relaxing and genuine in a way the other two islands weren’t.

    Our time in the Gili Islands was perfect. We snorkeled at the reef right off of the beach in Gili Air. We had fresh seafood meals every evening: calamari, king prawns, black snapper and lots of tuna. We lounged on our private rooftop patio and read books to our hearts’ content. We then hired Captain John and his boat to take us to explore the other two islands. There was no shortage of beachfront massages in Gili Trawangan. A highlight of our time there was swimming with a beautiful sea turtle that Captain John led us to. This was a first for me, and I was in complete awe at how agile and serene the creature was under the water. I could have followed it for hours. We then walked the entire island and met with locals in Gili Meno while sipping on fresh fruit smoothies. We also plotted our return trip to the deserted beaches we found dotting the coastline of this less visited island.

    On our last full day, we decided to hire Captain John and his boat again to take us to Lombok to go in search of artisans. Lombok is famous for artisan products, and we wanted to see for ourselves what was being produced. The shore of Lombok was alive with beautiful green trees, fishing boats and women and children awaiting our arrival. As we pulled onto the shore, I felt flutter of excitement about our adventure. Our first stop was to an artisan village where every household was equipped with a loom to weave colorful textiles – rugs, scarves, sarongs, wall hangings and more. We stopped at a few places to see the process and then settled on entering into serious negotiations. One cooperative in particular caught our eye. We loved that it was specifically a women’s weaving cooperative. From making the products to merchandising the wares to the battle of the sale, everything was determined by fiercely talented and independent women. I bought meters and meters of fabric to take back to Kenya to make into pillow and cushion covers for a few hotels and dhows I work with. I knew they would be completely enamored with the colors and designs. After the deal was struck, we shared a Lombok coffee and my friend and I moved on to go in search of pottery. We discovered several pottery workshops where handmade vases, candleholders and cookware were being processed. Again, the entire village was set up to produce products for the international market. We even saw hundreds of boxes destined for Pier 1 in the United States containing gorgeous human-sized outdoor vases. We wrapped up the day in Lombok with a seafood lunch on the beach in the tourist town of Senggigi.

    As our time in the Gili Islands and Lombok came to an end, we tried our best to avoid the cattle car fast boat back to Bali and booked with another company promising a quicker boat and better service. Needless to say, the trip took just as long and was even hotter than the ride over. We did have actual seats this time, but the bad experience of the boat rides to and from Bali were enough to have us looking for plane tickets, helicopters or private charter boats for the next visit. Fast boat transfers were not for the faint of heart!

    We returned to Villa Sedang for another week of village immersion and local activities. Once I was recovered from the Gili Islands excursion, I started designing a village tour with the Villa Sedang staff members to benefit the local community. The tour would act as an income-generator for local projects and serve as an introduction to the area for guests to the villa. Villa Sedang staff, Ari and Budi, took Jennifer and me around the village to show us potential stops. We sampled food from independent food stalls. We stopped into the community center to see a school assembly. We visited a temple dedicated to water. We witnessed the process of harvesting rice. And we visited with a local family in their home. Once we returned to the villa, we hashed out an itinerary and a plan to promote the tour to villa guests. It was important that we stressed the impact it would have on the village and the projects that would be funded through it: coral conservation, beach cleanup, and recycling. It was so fun making this idea a reality. The best part of the entire process, though, was watching Ari’s eyes light up when he realized that through running this tour, he could play a real role in bringing change to his village, his family and his neighbors.

    With only a few days left in Indonesia, I decided to pick one more place to check out before heading to the airport. I chose Seminyak in the South. When I was researching cafes and coffee shops in Bali, the great majority of the ones on all the “must try” lists seemed to reside in Seminyak, as did the chic boutiques. As soon as we pulled into this area and drove down numerous streets lined with stores, restaurants, markets and spas, I knew I would love wandering aimlessly around the town. Hotels on the beach in Seminyak can be pricey, so I opted for a mid-range place among the hustle and bustle of the shopping area. It was great to be able to walk out of the hotel and immediately have tons to do. I ate at a colorful Vietnamese restaurant for lunch, had tasty gelato for dessert, sipped cappuccinos, and shopped until I couldn’t shop anymore. I took a short stroll on the beach, but the sand was incredibly hot and the waves were a bit too wild, so I returned to my hotel to begin finding space for all of my treasures in the limited luggage.

    On the ride to the airport, I felt conflicted. I found myself not ready to leave; not ready to say goodbye to the warm embrace that had welcomed me to Villa Sedang, and Indonesia in general. I also found myself anxious to leave so that I could start planning more amazing adventures around this insanely beautiful country. Thoughts of Borneo, Java and Sumatra were in my mind as the plane took off, and I eventually fell asleep dreaming of my return.

    Message greeting you at the beachside restaurant at Sunrise Resort in Gili Air

    Kelly Campbell is the co-founder and partner at The Village Experience (a community-tourism organization that brings travelers and community members together to make a difference). She is passionate about connecting with communities around the world and spreading awareness about human rights issues.

    Learn more about Villa Sedang on their Facebook page here.

  • Guide To Gorilla Trekking in Congo

    Guide To Gorilla Trekking in Congo

    Our guide to gorilla trekking in Congo takes travellers through the whole process of trekking the endangered mountain gorillas in Virunga National Park, permit cost, the best time to undertake the adventure, information on booking accommodation and transport, rules and regulations to follow when trekking gorillas, and the packing list for gorilla trekking in Congo.

    In the Eastern Democratic Republic of Congo, within the rainforests high on the mountains are the endangered mountain gorillas, one of the most sought-after wildlife species in Africa. These Great Apes live in Virunga National Park, a UNESCO World Heritage Site gazetted in 1925 and sprawling for over 7800 square kilometers. This Park is home to about 200 gorillas mainly occupying the southern region of the Park.

    Gorilla families and available gorilla Permits for the Democratic Republic of Congo

    Virunga National Park is a haven to about 8 habituated gorilla groups that include Bageni, Humba, Kabirizi, Nyakamwe, Rugendo, Lulengo, Munyaga, and Mapuwa, hence only 64 gorilla permits are availed each day for this Park.

    How to book Congo Gorilla Permits

    Congo gorilla permits are the cheapest (when compared with the other two destinations where Great Apes are tracked) and cost only $400 per person per trek. Gorilla Trekking in Congo is, therefore, the ideal destination for budget and adventure travellers who would be interested in travelling off-the-beaten-path. However, due to continuous rebel attacks within the Eastern part of the country, Congo has been considered very unstable and unsafe with the recent kidnap of British visitors (in 2018) and murder of Park rangers leading to the closure of the Park. However, Virunga National Park was eventually opened for tourism in 2019.

    Regardless of the endless fights, instability, and challenges in gorilla conservation, Virunga National Park is still regarded as a wonderful African treasure in addition to being an extraordinary gorilla trekking destination. This Park takes pride in being one of the first National Parks within the African Continent with rich biodiversity and home to some of the most active Volcanoes in the World.

    Congo Gorilla Permits are only issued by ICCN (Institut Congolais pour la Conservation de la Nature) but there are two ways to book for these permits. First, you can book on your own by applying directly to ICCN via the official Virunga National Park website, email, phone, or reaching their Head Offices in Kinshasa. This process is however more cumbersome and frustrating as sometimes it becomes difficult to get to them and even when you do, the reply is not always guaranteed in addition to some permits being set aside for direct sales.

    The second way to book for Congo Gorilla Permits is through a trusted Tour Operator or Travel Agency. A number of Tour Operators in Uganda and Rwanda usually book over 80% of these permits, with visitors charged a commission of ($50-100) for administrative expenses. However, this commission is relinquished when you book the entire gorilla safari with them.

    How gorilla trekking adventures are conducted in Virunga National Park

    Gorilla Trekking in Congo is usually an all-day adventure with an early morning start. A typical day starts at about 7:00 am with registration and orientation at the Bukima Ranger Post. Park trackers always go ahead to find the location of each habituated gorilla group and their general distance from the briefing point. Your level of physical fitness and personal interest will determine which gorilla group you can be assigned to and the length of the trek.

    After the orientation, you will walk or be driven to the starting point where the trek begins at 8:00 am, depending on the exact location of the gorilla group you will be trekking.

    Hike for 1-5 hours before you finally find your assigned gorilla group and in some cases, it takes even the entire day before you reach the gorilla group. The scenery in Virunga National Park is incredibly beautiful and the hike to find mountain gorillas is just part of your experience. Always make sure to move at your comfortable pace and keep hydrated at all times especially at higher altitudes.

    As you start approaching the gorilla group, rangers will request you to leave your bags as you get closer to the gorillas. The moment you make contact, you will be allowed to spend one full hour with the mountain gorillas. You will see them munching on Bamboo shoots, grooming each other, resting, hanging on trees, mating, playing and mothers breastfeeding their young ones. Every gorilla trekking experience in Congo is exceptional thus make use of your one hour to enjoy this once-in-a-lifetime experience.

    Even when gorillas are on the move, you will move along with them as long as you maintain the minimum distance of 7 meters. There are instances of them approaching visitors but don’t feel frightened but instead slowly move back. Your guides are experienced and will be of great help in answering all your questions about the mountain gorillas, the rainforest, and other wildlife and bird species of the Park. These guides intimately know each gorilla group and can even identify each of them by their individual names and personalities.

    How difficult is gorilla trekking?

    Gorilla trekking is generally a physically demanding activity with visitors expected to walk through muddy trails, dense forests, and thickets thus it is important to always be prepared both emotionally and physically. The mist and abrupt or unexpected rains sometimes mean that hikes are slippery and at times muddy. However, porters can be hired to carry your backpack and camera equipment in addition to adding humor and excitement to the adventure.

    Important Gorilla Trekking guidelines in Virunga National Park

    When trekking gorillas in Congo, there is a need to follow the important trekking guidelines issued during a briefing at the Ranger post. Some of these guidelines include following the minimum trekking age limit of 15 years, spending only one hour in the presence of the mountain gorillas after hours of finding them, visiting each habituated gorilla family in a group of not more than 8 persons, maintaining a minimum distance of 7 meters when observing and taking photos of these Great Apes, keeping voices low while trekking or observing them, avoiding the use of flash photography, not drinking, eating or smoking while in the presence of mountain gorillas, first washing hands before embarking on gorilla treks, not littering the forest and keeping any rubbish or food leftovers to yourself and most importantly avoiding direct eye contact with the gorillas.

    Best time for Gorilla Trekking in Congo

    The Democratic Republic of Congo can be visited all year round although the best months to trek gorillas are June to September all the way to February. Most travellers opt to visit these Great Apes when the rain is reduced and the sun is shining through the jungle. December is the busiest month for Virunga National Park and it is prudent to book for the Congo Gorilla Safari. Much as the rainy season affects many plans and engagements, it doesn’t mean that the scheduled gorilla trek will completely not happen. Therefore even during the rainy season, the sun appears after a heavy downpour hence gorilla treks can go on without interruption.

    Safari lodges also offer discounted rates during the rainy/low season as a gesture to attract more visitors.

    What to pack and wear for Congo Gorilla Trekking

    Your typical day of trekking Congo gorillas is long and fairly difficult while mornings and evenings in Virunga National Park are cold. Packing and wearing the right gear/equipment will make your day remarkable and unforgettable. Have a portable backpack for carrying a lunch box, drinking water, and rain jacket during the trek, Strong hiking boots with extra ankle support for muddy and rocky terrain, a long-sleeved shirt for protection from insects, stinging nettles and sunshine, lunch box, long cotton socks, rain jacket, first aid kit with plasters, antiseptic wipes, rehydration sachets, anti-histamine cream and tablets, pair of binoculars, sunglasses, and sunscreen, camera, gardening gloves to protect your hands, a warm sweater for cold mornings and evenings, hiking pants and many others.

    How to get to Virunga National Park

    Virunga National Park is about 19 miles to the west of Goma Town, Eastern Democratic Republic of Congo. Most travellers to this destination usually jet into Kigali International Airport and catch the 4-5 hour road trip to the Goma-Gisenyi border crossing then continue to Virunga the same or the next day. Alternatively, flights can land at Congo’s Goma International Airport then continue by road.

  • Getting Around Milan: Metro, Bus and Tram

    Getting Around Milan: Metro, Bus and Tram

    The public transport company in Milan (ATM) is very efficient, at least for the Italian standards. Four metro lines (soon to be 5), tram, buses, trolley-buses, and the passante ferroviario (overground metropolitan train), connect the whole city.

    The trolleybus runs along a ring road surrounding the city centre (circonvallazione) and runs also during the night, with only a gap between 2am and 4am. It will probably be your only chance to get back home before dawn after a night out but it has a horrible reputation so look out. Even though it looks pretty rough I don’t think it’s that dangerous, however I would recommend a lone female traveller to avoid it.

    How much is the ticket?

    The single fare costs 1,50 euro and it’s valid for all the urban lines. It’s valid for 90 minutes, during which you can have only one journey on the metro and unlimited use of the overground lines (bus, tram, trolleybus).

    Other options are the 24 hours pass (€4,50), 48 hours pass (€8,25) and a 10 tickets carnet (€13,80). There’s also a 2×6 formula, that works as having 2 single tickets a day, for 6 days in a week. This is normally used by commuters working in the city. You might find it useful to know, especially if purchasing the ticket at the newsagent, that the “pass” is called “abbonamento“. You can find more detailed information here.

    RicaricaMi

    If you’re staying for a longer period you might consider purchasing the top-up card called ricaricaMI. Like the Oyster Card in London you can top it up with both single tickets and any of the passes listed above; it costs €2,50 and includes a single ticket. It will save lots of paper, think of the environment! (yes, I know, the stations are paved with used tickets but someone should set the example).

    ATM Travel Card

    If your engagement with Milan is going to last for a few months you might want to get a travel card. It costs €10 and you’ll need a passport sized photo, that will be horribly warped by the software that prints your face on the plastic card. So don’t bother, your hair is fine just like that.

    The car can be topped up with a weekly pass (€11,20) or a monthly pass (€30), students and under26 will get a good discount. See all the details on this page on the ATM website.

    Plan your journey with GiroMilano (opens official Milan Transport site)

    Milan city centre public transport map: Metro, Bus, Tram (PDF)

    The updated Metro Map including the Passante:

    Bicycle and bike sharing in Milan

    There’s nothing better than a good ol’ bicycle to get yourself around Milan. The city is small and completely flat and you’ll be whirring from one side to another at incredible speed. You might not be faster than the metro but it’s a fair competition with the buses, which normally get stuck in the traffic. The only downside is that some paved streets will make your brain bounce inside your skull. It can be hard work avoiding cars, pedestrians and tram rails on a paved street. And if the road is wet…you’d better be very sober!

    [box type=”bio”] You can rent bikes through the city bike sharing program, very useful in the city centre.[/box]

    But if you want to invest on your very own velocipede you might want to go for a second hand. You’ll find some bargains on the second-hand websites or you can google “ciclofficina” and find the nearest where you can go and put together your own custom bike…or fix it when needed. These are bike laboratories set up mostly by university students or by autonomous associations.

    You can take your bike on the metro and on the passante ferroviario. Technically rush hour is off-limits but if the station is not too busy nobody will complain.

    If you’re looking for a place to stay in Milan, a room or a flat on Airbnb might be your best bet. Cheaper than hotel, comfier than most hostels, you will be staying in a private house in areas where locals live for real. And you will be able to see why Milan has such a reputation for interior design…
    Sign up clicking the link above to have £25/$33 off your first booking!

    Taxi in Milan

    Taxi drivers don’t enjoy a great worldwide reputation, and Milan is no exception. A taxi ride can be more expensive than expected, especially when compared to the size of the city and the cost of public transport.
    But when there are no other options you can use a taxi app (TaxiYoo, TaxiMilano, MyTaxi) or call the unique number that will put you in contact with the first available taxi from any company.

    Or you can Uber it, if you sign up to the service clicking the link below you get money off your first ride

  • Sunday Along the Wall

    Planning a normal Sunday out in Berlin doesn’t usually consider anything before lunch time. In a city where even during the week people start sipping their coffees never before 9am it’s safe to assume that Sunday morning doesn’t exist. It did though for me and my friend Totò who insanely booked a flight back home departing at noon. We hence woke up a few minutes after having laid down and headed to the Kaffeebar for a robust dose of caffeine, served in form of a flat white so good that put immediately this café in my favourite ones.

    Alltag in der DDR @ Kulturbrauerei

    Knaackstraße 97, Prenzlauer Berg

    After breakfast I saw my friend off to the U-Bahn station and plan to go to the Kulturbrauerei. In this remarkable building an exhibition has been recently opened, exactly one week after my last visit. It’s called Alltag in der DDR (Everyday life in the GDR), it’s free and offers a rich display of objects, footage and stories to paint an accurate picture of that life was in East Germany. It would have been a perfect warm up before my Wall-filled afternoon plan, but I decided to go back to bed and postpone the visit to the next day. Of course the museum is closed on Monday.
    On this page you can find the opening times and even a video.

    Currywurst at Konnopke Imbiss

    Currywurst under the rail tracks

    Lunch and bratwurst

    To get closer to the area I intended to visit in the afternoon I perfectly planned a lunch at the famous Konnopke Imbiss. I missed it at my first visit in Berlin, I couldn’t fail now. I’ve already gave it a first scan a few days earlier, peeping through the big windows and drooling on the pavement. That juicy currywurst (apparently the best in Berlin?) with a rich side of chips would have surely saved me from my hangover.
    But another disruption of my plans was on the way: two friends of mine invited me to a park to assist to the most important world competition of Fistball, which a sort of proto-volley where people in a field punch the hell out of a ball throwing it across a rather low net. I couldn’t miss such opportunity so I headed off to Wedding, mainly attracted by the prospective of cheap BBQ. It was really worth it: the grilled steak was juicy, the sport was really entertaining and I was surrounded by Germans, a rare occurrence in Berlin.

    Mauerpark

    A Sunday afternoon in Berlin would be wasted for me if I don’t go to the Mauerpark, and so we did after the exciting Fistball finals. If you followed to my plan and went to Konnopke Imbiss it would be a short walk to the Mauerpark. The park, a former rail interchange turned death strip now hosts a massive flea market selling everything from antiques to local art and cheap clothes, ideal for stocking up on souvenirs and postcards, while the other side of the park is dotted with live bands. One edge is still marked by a stretch of Wall, where graffiti constantly change. But the arena is where the main act happens: the Bearpit Karaoke, an event started only five years ago but became an institution attracting every Sunday thousands of people. The rules are simple: singers signs up, choosing a song and, one by one, are called to sing and humiliate themselves in front of a roaring crowd. Why so many people want to do that to themselves will always remain a mystery to me. We enjoyed most of it, the best ones are always those outstanding, either outstandingly good or crap, but all of them gave me the satisfying pleasure of sneering sarcastic comments. However here I learnt that the difference between public humiliation and crowd-pleasing triumph doesn’t necessarily depend on the vocal skills but, mostly, in the confidence in delivering the performance.

    Before entering the park we sensibly bought some cheap beer at the only Spätkauf in the area, just around the corner in Oderberger Str. Opposite to it there is the Bonanza coffee heroes where, in case you just woke up and skipped all of the above, you will be brought back to life by the skilled baristas with some of the highest quality I’ve ever tried.

    Wall memorial, Bernauer Strasse, Berlin

    The Wall memorial and the Sky above Berlin

    Bernauer straße Wall memorial

    Once the party was over I thought it would be wise to set back to that gloomy mood that’s very much appropriate to a Sunday evening. Walking east after leaving the park, I quickly reached the beginning of the Bernauerstraße memorial (or Gedenkstätte, which became one of my favourite German words), that reaches all the way to Nordbanhof, 1.5Km down the road.
    Part of the original Wall is preserved or, when not, it’s replaced by countless iron rods. As simple as it is, I found it the most dramatic testimonial of that era: with its intact and graffiti-less concrete slabs, and the death strip left empty as it was, it gives a very realistic idea of what it must have meant to have a wall running all along the road in front of your house. Or maybe not because I cannot even get close to thinking what it means to take the decision of leaving all your life behind and jump off the window of your house as the wall is being erected, to be safe on the other side.

    Jazz and cigarettes @ Manouche

    Grimmstraße 23
    Tue – Fri 17:00 – 00:00, Sat – Sun 15:30 – 00:00

    I abandoned the wall memorial as dusk was suitably settling like a thick silk blanket on Bernauer Straße and, with a head full of thoughts, I head back to Kreuzberg. My feet instinctively steered me towards the Manouche, a sweet little spot not far from the Landwehrkanal. Barely visible from the street, it’s a cosy basement bar with a vaguely French atmosphere, serving delicious crêpes and, generally, good mood. On most Sunday nights they have live jazz music in one of the two back rooms, in which case it gets very crowded and smoky.

  • Berlin Dark History: 2 Days with the Stasi

    Berlin Dark History: 2 Days with the Stasi

    The Stasi, the most efficient and merciless secret police service or our times, had been dominating East Germany in terror for 40 years.  However there is little coverage around it, and museums dedicated to its history are far from the city centre, kept away like a shameful secret. Here’s a list of places you could, and should visit, to learn more about how life was in the DDR.

    Day 1


    DDR Museum

    Address: Karl-Liebknecht-Straße 1, 10178 Berlin
    Opening Hours: Sun-Fri 10am – 8pm / Sat 10am – 10pm
    Phone: +49 30 847123731 / Website
    Tickets: €6 / €4

    Let’s have a light start here: after breakfast head to the DDR museum, located near the museum island, opposite the Cathedral. This is an interactive museum where you can learn and experience directly how was life in the DDR. There are photos, and videos, examples of real life jobs and salaries, there’s a kitchen and a living room where you can sit, watch the telly and use the phone. There are lots of drawers to open, things to move, games to do… some people will probably still remember queuing after those two guys for two hours while they unsuccessfully tried to write their name in Russian. They have a few sections dedicated to Stasi, providing the most important fact and offering a reproduction of an interrogation room and a prison cell. They also offer guided tours in 15 different languages.
    It’s conveniently located in the city centre, informative and safe for families. If you want to know more details and you’re not afraid of walking right where evil really happened, keep on with the tour!

    Stasi Ausstellung

    Address: Zimmerstraße 90, 10117 Berlin
    Opening Hours: Mon-Fri 10am – 6pm
    Phone: +49 30 232450 / Website (in german) / email
    Tickets: Free!

    A 30 minutes stroll from the DDR Museum, or a quick bus ride, and we’re in this sweet little exhibition which will educate us on everything about Stasi. Not to be confused with the proper Stasi Museum, it’s very neat and comprehensive, basically a 3D lecture on the infamous secret police. It’s quite hidden away, few steps away from Checkpoint Charlie and dangerously on the border of the tacky funfair the area is being turned into. Fence off the tourists, herded from their tour buses to the souvenir shops and the iconic selfie locations, pass by the other tourists sitting outside the Einstein café lost in their maps and travel guides and you’ll find the unassuming building hosting the Stasi Ausstellung to your right. The building itself, despite its modest looks, is rich of history: one of the most ancient trade building in town have seen the merchant replaced by Nazis first and Stasi agents later, and finally a museum. Which is a procedure apparently applied to most buildings in Berlin.
    Not only the entrance is free but you can also pick a free audio guide (available in several languages) providing a detailed explanation of the whole exhibition, and a nice booklet summarizing all of its content. You will need all of this if you cannot read German.
    The only other person visiting while I was there had the privilege of being personally escorted by a member of staff. He surely was a journalist or university professor, but next time I’ll give it a go and send them an email in advance.

    That’s all for the day, enough culture to get us ready for tomorrow’s action. Now it’s time to head back to some nice café to read the leaflets and let the information settle in your brain.

    Move on to the second day of our tour

    Yesterday we’ve learnt all we need to know about how life was in the DDR and how the Stasi operated, today it’s time to dip into the thick of it, visiting what were the neuralgic centres of the feared secret police. Once to blank spots on the Berlin map, now the former headquarters and police are open for visits. Despite their remoteness – for obvious secrecy reasons they’ve been set up in the desolate Lichtenberg – and they scarce advertisement they enjoy, they were bustling with visitors mainly school kids.

    Today schedule is pretty intense, physically and emotionally, and there is some travelling involved so an early start is recommended.

    Day 2


    Stasi Museum

    Address: Ruschestraße 103, 10365 Berlin
    Opening Hours: Mon-Fri 10am – 6pm / Sat-Sun 12am – 6pm
    Phone: +49 30 5536854 / Website / email
    Tickets: €5 / €4

    At my arrival I thought I’ve been victim of a bad joke, or that I wasn’t informed that the Stasi was back to their headquarters, fully operational. The museum and former offices occupy a whole block of a cube of concrete so big that makes your neck hurt, so grey it make you grasp for air. The enormous yard hidden inside this square of buildings, was the deserted with the exception of a man briskly walking and the occasional tumble weed, everything was quiet as if some very secret business is carried on. Probably what happened here was so tremendous that walls, windows and the ill-looking shrubs, preserve a sort of memory that is transmitted to the visitors in form of intimidation. I walked hesitantly through the door and I had a confirmation that my fears were real when the cold glare of the desk receptionist struck me like a laser icicle.
    The museum can be visited independently but the vastity of the exhibition and the signs written mostly only in German make a guided tour desirable. There’s no extra cost but tours are organised for groups of at least 10 people. I recommend writing them at least a couple of weeks earlier, so that they can set something up for you, perhaps joining a few lone travellers and small groups together. I emailed them only two days before and, after being told off in typical German fashion, I was said I could join a group at 10am. The group was in fact a class of teenage English students – as the austere receptionist pointed out – I was panting and perspiring (it’s a short walk from the U-Bahn unless you get directed to the opposite direction by an ill-willing citizen) and I sidled up to one of the teacher who jumped as I had attacked her on a dark rainy night in Brixton. Not a good start. For a while I stuck to them, mostly hiding behind corners or pretending to be looking elsewhere, receiving suspicious looks from teachers and students.

    The guy was passionate and competent, and I would have listened to him forever, but he was spending hours in each room and the situation was getting dangerously awkward, so I left them at the first floor, which was dedicated to the historic context, and moved upstairs to the perfectly preserved offices. This is where the higher ranks of the Stasi used to work, and it’s quite obvious that the aim – and possibly the results – of the interior designers were to make everyone feel an anonymous, grey, insignificant part of a bigger machine. The absence of colours is striking, everything is in every hue of grey: brownish-grey, dark green-grey, mustard-grey. And, of course, forget computers, posters and USB rocket launchers. Everything in those offices is simple and essential: a typing machine, a telephone, a box with some buttons. And lots of empty space. Even Erich Mielke’s office, despite being the Supreme Master of Evil, was identical to the others, except for the fact that it gives you the creeps thinking of the viciousness that dwelt here for four decades.

    The upper floor is more entertaining and if possible more crude. Here are displayed the advanced technologies used to spy the population’s everyday life and the smuggling techniques employed to counterfeit the terror.

    There are some weird things such as cameras hidden in bird boxes, or cameras in dust bins triggered by the pedal opening the lid, but also shockingly advanced pieces of tech:a camera hidden behind a coat button which is as old as me and as big as my mobile phone. All this courtesy of Siemens, and it comes natural to think that the technology behind the devices we carry in our pockets today came at cost of many lives. On the other hand carrying people out of the DDR or smuggling in books and other western goods was all a matter of creativity and little means. It’s like a battle between cunning, bold humans, and deadly robots from the future. Like Terminator.

    Stasi Prison: Hohenschönhausen

    Address: Genslerstraße 66, D-13055 Berlin
    Opening Hours: Mon-Fri 10am – 6pm
    Phone: +49 30 232450 / Website (in German) / email
    Tickets: €5 / €2.5

    Of all the stops in our “Stasi tour” this is one not to be missed. Try to pronounce the word “Hohenschonhausen“; if you get it right you might give yourself a cold shiver down the spine. This terrorizing prison can only be visited with a guide, and tours in English are run once a day at 14.30. If you understand German not only you can enjoy more flexibility but you are likely to get a former inmate as a guide and I’ve been ensured it’s pretty intense.

    The tour starts with a 30 minutes video delivering interesting facts and shocking figures. The next step is the infamous U-Boat, the submarine. Originally used by the Nazis as food storage it has been turned by the Soviets into a fearful underground jail, like those you might see in Rambo movies, where prisoners were kept for days in few inches of ice-cold water, or in a padded, dark and isolated room, without food or even a bucket. It’s quite gripping to know that someone here managed to be even more evil and sick than Hitler’s troops.
    Our tour leads next to the newly built prison block, despite being slowed down by a big Iranian man who stops at every cell looking around lost as if he was thinking of how to decorate it. The building is, in typical soviet fashion, grey and depressing. It reminds me the hostel where I stayed in Bratislava, except for the rooms which are way better here.

    The cells in fact look like single room, with a large bed (where the Iranian man sits with loud creakings, probably considering a nap), a basin and a cupboard, luxury. Someone points that out to our guide, which agrees and explains why. This was all a cunning psychological trick to make the inmates remember how it was to be alive: in fact they didn’t have any belongings to put in the cupboard, they couldn’t sit on the bed during the day, nor they could do any exercise if not standing, the window is bright but the thick glass impedes any sight of the outer world. And so on, down to details to clever and sick to make you doubt of the good nature of the human race. At the end of the tour we reach the “tiger cage”, where well behaved prisoners were taken for a glimpse of sky and fresh air and the Iranian man is invited to talk. He explain to us how he’s been through the same treatment and torture in his country, just 3 years ago before managing to escape to France. This made me think of how deeply these horrors belong to the human nature, wondering how many people are being tortured right now. It also explains the strange behaviour of this man in the cells and make me consider what a massive dick-head I’ve been judging him.

    This was a very intense day, I couldn’t leave the building without first smoking a cigarette next to two old guides, wishing I could speak enough German at least to express my sympathy. I also couldn’t leave Lichtenberg before finding my way back to the tram, which proved more difficult than I thought. Just remember to walk straight ahead as you leave the gates, in case you don’t have a map with you.